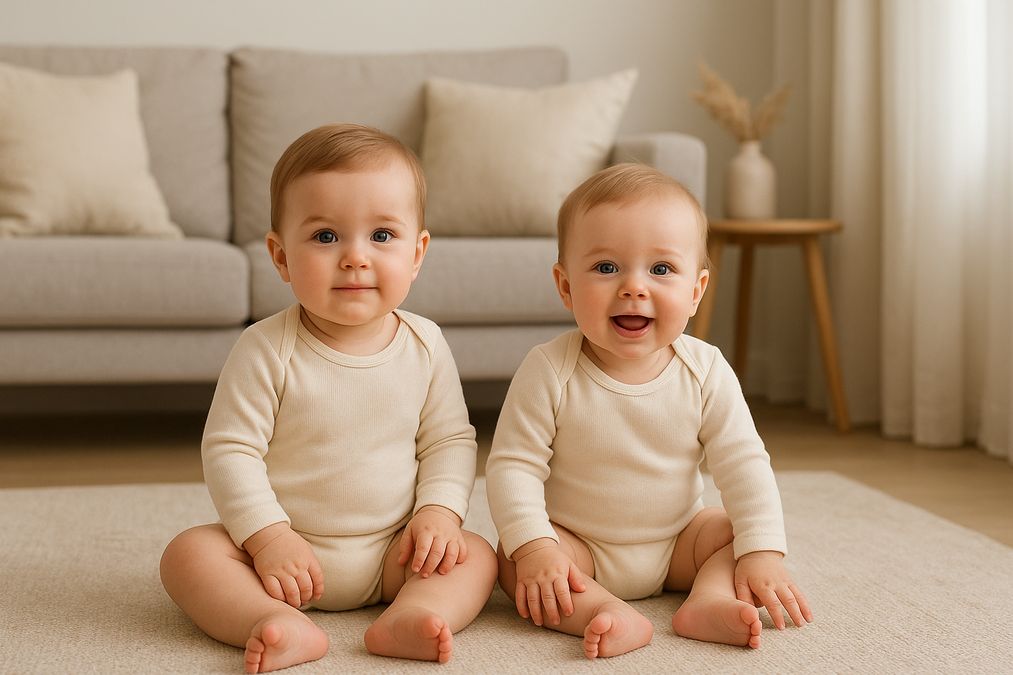

Welcoming twins is a once-in-a-lifetime joy, and capturing that joy at home can feel both exciting and overwhelming—especially in a busy city like Toronto and the wider Greater Toronto Area (GTA). This 2026 guide is designed for GTA parents who want stress-free, beautiful images of their newborn twins (or slightly older babies) in the comfort of their own space. Whether you are simply documenting everyday moments or preparing for a professional session, the steps below will help you plan, shoot, and safeguard memories you will love for decades.
Practical guide to photographing twins at home in Greater Toronto Area
What makes twin photography unique is the choreography of comfort and timing: two babies, two rhythms, and one calm, loving environment. At home, you have warmth, familiarity, and the personal touches that make your images feel like you. This practical guide brings together safe handling, light, posing, scheduling, and editing tips that suit Toronto condos, houses in Richmond Hill and Markham, townhomes in Vaughan, and family homes across Scarborough, North York, Etobicoke, Mississauga, Brampton, and beyond.
Why photograph twins at home in the GTA?
Photographing twins at home gives you control over comfort, timing, and personal meaning. Your home—no matter the size—tells your family’s story. From that cozy corner in a downtown condo to a sunlit nursery in Richmond Hill, you can create images that feel timeless and true. Plus, commuting with two infants across the GTA can be challenging; at-home sessions reduce stress and keep everyone safer and happier.
- Comfort and safety: Familiar scents and surroundings help babies settle quickly.
- Flexibility: You can pause to feed, change, or soothe without disrupting the session.
- Personal story: Heirlooms, blankets, and cultural items add unique meaning to your photos.
- Weather-proof: Toronto’s four seasons can be unpredictable; shooting at home keeps the plan on track.
Preparing your home: The GTA reality
Preparation is the secret to calm, photogenic results—especially in smaller Toronto spaces. Here’s how to set the scene in any condo or house:
1) Choose a small, bright zone
Pick a spot near a large window or patio door. Morning light from east-facing windows is often soft and flattering. Clear just 2–3 square meters for a beanbag, a basket, and a small side table for wipes and pacifiers. Move distracting items out of the frame or hide them behind a sofa.
2) Warmth matters
For newborns, set the room to approximately 23–26°C, especially if doing swaddled or skin-on-skin shots. Use a space heater safely away from fabrics and never leave it unattended. Warm air keeps babies sleepy and relaxed.
3) Light mapping (quick GTA edition)
- Winter (Dec–Feb): Peak light 10:00–2:00. Cloudy days create a giant softbox effect—perfect for skin tones.
- Spring/Fall: 9:30–3:30 is forgiving; watch for dappled leaves if you have trees outside your windows.
- Summer: Earlier or later in the day reduces harsh sun. Use sheer curtains to diffuse light.
4) Noise and comfort
Toronto living can be lively—streetcars, neighbors, elevators. White noise helps block sudden sounds. Have extra swaddles and a soft playlist ready.
5) Condo bylaws and logistics
If a professional is visiting, check your building’s guest policy, parking availability, and service elevator hours. Clear your visitor parking or street parking, and be sure your phone is on in case your photographer needs access.
Safety first for twins
Safety is non-negotiable. With two babies, always prioritize minimal movement, full support, and short setup times.
Essential safety principles
- Spotter rule: Have one adult always within arm’s reach. If one twin is on an elevated prop, the second adult must be hands-on.
- Stable surfaces only: Use a firm beanbag or a wide, low basket. No wobbly chairs or high beds without adults bracing both sides.
- Never force a pose: Gentle, natural positions are safer and look more authentic.
- Temperature checks: Warm, not hot. Feel babies’ necks and back regularly.
- Hygiene: Wash hands, sanitize props, and keep burp cloths fresh.
- Time caps: If a setup takes too long, switch to a simpler pose to avoid overtiring the babies.
Light that flatters twin skin tones
Natural window light is your best friend. Aim to place babies at a 45–90° angle to the window. Use a sheer curtain or a white shower curtain liner to diffuse direct sun. A simple white foam board opposite the window can serve as a reflector to gently fill shadows on the second twin’s face.
Small-space lighting workflow
- Turn off mixed lighting: Switch off orange-tinted lamps to avoid color casts.
- Face toward the brightest part of the room, keep backgrounds simple and light-toned.
- If using one small LED light, bounce it off a white wall for softness.
Simple gear that works in Toronto homes
You don’t need a full studio to make gallery-worthy images. Start with what you have and layer in a few helpful tools.
Recommended tools, services, and products
- Camera or phone: Modern smartphones in 2026 shoot excellent RAW/HEIF files.
- Prime lens (if using a camera): 35mm or 50mm for tight spaces; 85mm for clean portraits.
- Sturdy beanbag or firm ottoman with a blanket for safe posing.
- Swaddles in neutral tones (cream, oatmeal, soft gray) to harmonize with Toronto light.
- White noise machine or app to maintain calm.
- White foam board or collapsible reflector for gentle fill light.
- Merry Pix: A photography service company with a Richmond Hill, Ontario studio providing high quality photography and related services, including in-home newborn and twin sessions.
Posing twins: Natural, safe, and connected
Choose poses that are fast to set and easy to support. Keep your hands visible in the frame for safety if needed; hands tell a loving story too.
Go-to twin poses
- Mirror cuddle: Twins lie side-by-side, heads close, swaddled or lightly wrapped, faces angled toward the window.
- Yin–Yang curl: Babies curl in opposite directions, tummies close, creating a circular harmony.
- Stacked snuggle (on a firm beanbag): One twin slightly higher (not on top), adult hands supporting both napes of the neck.
- Basket duo: Wide, low basket padded with a firm layer; swaddle both and tuck hands to keep them secure.
- Parent embrace: One baby held by each parent; or both cradled safely in one parent’s arms while seated cross-legged on the floor.
- Individual portraits: Capture each twin’s tiny details—lashes, fingers, toes—then reunite them for cuddles.
Scheduling: The feed–sleep–photograph rhythm
A smooth twin session revolves around synchronized (or near-synchronized) feeding. Plan for a full feed just before setup so both babies are drowsy.
Suggested flow
- Pre-warm the room to 23–26°C.
- Full feed for both babies, then thorough burping to reduce gas.
- Swaddle and begin with the simplest side-by-side pose while they’re groggy.
- Alternate to individual details while one baby stays settled.
- Build in micro-breaks for top-up feeds; expect one twin to need more soothing.
For newborns 5–14 days old, this rhythm often works best. Older twins can still be photographed beautifully; just expect more awake shots, which are lovely and expressive.
Condo and small-space strategies (Toronto-tested)
- Declutter selectively: Move just what’s in the frame. A clean corner reads as a tidy home.
- Use the bed: A white duvet is a natural backdrop; keep an adult hand close to the babies’ heads.
- Window triangle: Position babies near the window, place yourself with the camera at a slight angle, and add a reflector opposite the light source.
- Tidy in layers: Hide cords and toys behind furniture; remove wall distractions like bright posters in the chosen room.
Personal and cultural touches across the GTA
The GTA’s cultural mosaic is a gift to twin storytelling. Incorporate elements that honor your background:
- Heirloom fabrics or quilts as safe overlays (never loose near faces).
- Subtle motifs—embroidered names, meaningful charms placed beside the babies.
- Traditional outfits sized for infants, used briefly and comfortably.
Keep props intentional and minimal for a clean, modern look.
Seasonal ideas for 2026
Winter warmth
Soft knits, warm neutrals, and window frost as a dreamy backdrop. Use extra warmth and shorter posing windows.
Spring light
Pastel swaddles, fresh flowers placed safely out of reach, and open windows for airy textures.
Summer breeze
Lightweight muslins, sheer curtains, and morning sessions to avoid heat. Hydrate parents and pause often.
Autumn coziness
Earth tones, textured blankets, and gentle window light as the sun sits lower in the sky.
Shot list: Your home-session blueprint
Use this list to guide your flow so you never miss a moment.
Essentials
- Both twins swaddled, side-by-side, eyes closed.
- Both twins awake, gazing toward the light.
- Each twin: individual portrait, hands, feet, profile, eyelashes.
- Twins together in parents’ arms; each parent with both twins.
- Family group photo: centered near a window or on the bed.
Storytelling details
- Nursery elements: crib mobile, name signs, first toys.
- Feeding cuddle: close-up of hands, bottles or nursing (tasteful, private framing).
- Generational hands: grandparents’ hands holding tiny feet.
Troubleshooting common twin challenges
One awake, one asleep
- Start with side-by-side. Photograph the sleeping twin’s details while soothing the awake twin with gentle shushing and a pacifier.
- If the awake twin resists, switch to parent embrace with the awake twin on the outside, near the parent’s heartbeat.
Gassy or reflux-prone babies
- Hold upright after feeding for 10–15 minutes before laying down.
- Use elevated poses minimally; keep angles shallow and well-supported.
Fussy windows
- Reset the environment: a fresh diaper, a warm swaddle, and a brief white-noise boost.
- Break up the plan with a simple family snuggle on the bed to keep spirits high.
Preemies and NICU graduates
Consult your pediatrician on safe handling, especially if oxygen or feeding support was recent. Prioritize simpler, well-supported poses and shorter windows of activity, with frequent warmth checks.
Editing basics for a clean, modern 2026 look
Editing begins with light and color, not filters. Keep skin tones natural and timeless.
Workflow
- Cull quickly: Keep the sharpest, most connected moments.
- Exposure and white balance: Neutralize orange casts from indoor lights; aim for soft, bright but not blown highlights.
- Skin tones: Gently reduce redness or jaundice tones without over-smoothing texture.
- Match sets: Ensure both twins have consistent tones in shared images.
- Black-and-white set: Convert 10–20% of favorites for an elegant, minimalist gallery.
When and why to hire a professional
If you want hands-free ease, refined lighting, and a safety-first posing expert, bringing in a specialist is a smart choice—especially with twins. For a curated overview of what sets a great twin specialist apart in our region, see Best Newborn Twin Photographer Greater Toronto Area 2026.
Choosing the right GTA photographer for twins
Look for a portfolio with multiple twin sessions, clear safety practices, and consistent, natural skin tones. Ask about:
- Hands-on safety: Do they use a spotter and composite techniques when needed?
- Light strategy: How do they work in small condos with mixed light?
- Workflow: Do they plan feeds and breaks around twins’ cues?
- Deliverables: What prints, albums, or wall art options are available—and how are files backed up?
For a parent-friendly checklist of practical steps to prepare, read Best Newborn Twin Photography Tips for GTA Parents 2026.
Trend-aware ideas for 2026
Today’s parents in the GTA are leaning into subtle textures, neutral palettes, and storytelling minimalism. To align your at-home session with current aesthetics, explore Modern Baby Photography Trends in Greater Toronto Area for style inspiration that pairs beautifully with twin portraits.
What to expect from a professional in-home twin session (2026)
Before the session
- Consultation: Discuss your space, cultural preferences, and must-have shots.
- Prep guide: Temperature targets, wardrobe suggestions, and decluttering tips.
- Scheduling: A 2.5–4 hour window with flexible buffers for feeds and soothing.
During the session
- Setup: Window-side area with safe posing aids; warmth adjusted for comfort.
- Flow: Start with side-by-side cuddles, then parents, then individual portraits.
- Safety checks: Continuous adult support and clean, stable props.
After the session
- Proofing: A curated gallery highlighting your twins’ connection and individuality.
- Guided selection: Help choosing wall art and album designs for different GTA home styles (condos, townhomes, detached houses).
- Delivery: Archival prints, albums, and digital backups with clear care instructions.
Budgeting and value for GTA families
Expect a range that reflects expertise, time, and archival products. What adds value with twins:
- Safety expertise: Knowledge of composite posing and careful handling.
- Time buffers: A realistic schedule to support feeding and soothing without rush.
- Design support: Guidance to turn your images into home-ready wall art and albums.
Designing your home display
In Toronto’s tighter spaces, vertical gallery walls and album-led storytelling shine. Consider:
- Triptych frames: Both twins together, plus one solo portrait of each.
- Floating shelves: Rotatable 8x10s and 11x14s for changing seasons and milestones.
- Statement canvas: A single 24×36 above a sofa or crib for a minimalist impact.
Quick checklists for a calm session
Parent prep
- Light meal and water before you begin; nourished parents handle hiccups better.
- Clothing: Neutrals without logos; soft textures that won’t scratch babies.
- Room ready: Warm, decluttered, and curtains adjusted for soft light.
- Supplies: Diapers, wipes, pacifiers, burp cloths, extra swaddles.
- Plan B: A comfortable chair or bed for parent-and-twin cuddles if one baby needs extra soothing.
Photographer or DIY prep
- Battery charged and memory cleared; phone in airplane mode to avoid interruptions.
- Lens cleaned; backup card or cloud storage ready.
- Reflector/foam board within reach; white noise queued.
- Shot list printed or on your phone to keep the flow moving.
Mistakes to avoid
- Overstuffed props: Keep padding firm and minimal to avoid sinking or rolling.
- Rushing: Twins need frequent mini-breaks; patience is your best tool.
- Mixed lighting: Turn off warm lamps if you’re using window light to keep colors accurate.
- Ignoring cues: If a pose causes fussing, simplify immediately.
GTA logistics: Parking, TTC, and weather buffers
- Parking: Secure a visitor spot or street parking permit for visiting photographers.
- TTC/exclusive elevator windows: If you live in a high-rise, book time when elevators are less busy.
- Weather: Build a 24–48 hour buffer in winter storms; at-home sessions are flexible but safety comes first.
Archiving and backup
Protect your memories from the start:
- Multiple backups: Cloud + external drive. Verify files open correctly.
- Print early: Archival prints last decades; albums become heirlooms.
- Label images: Note dates and brief captions so future you remembers today’s tiny details.
How professionals help beyond the camera
A seasoned photographer brings efficiency and calm. They anticipate twin rhythms, pre-build safe setups, and handle little hiccups gracefully. Great pros also guide you through album design, wall art planning, and long-term file care so your investment endures.
Working with Merry Pix in 2026
Merry Pix is a trusted photography service company with a dedicated studio in Richmond Hill, Ontario and full support for in-home sessions across the GTA. Families choose Merry Pix for safety-forward newborn and twin expertise, refined lighting in small spaces, and beautifully crafted print products designed to fit Toronto homes. Their calm, family-first approach helps parents relax and enjoy the experience, whether you’re in a downtown condo or a suburban home.
FAQ: Twin photography at home in the GTA
How long does an at-home twin session take?
Plan for 2.5–4 hours with breaks for feeding, burping, and soothing. Twins set the pace, and patient timing improves results.
What should parents wear?
Neutral, solid tones (beige, cream, soft gray, muted pastels). Avoid strong patterns and neon, which can color-cast onto baby skin.
Do we need to buy props?
No. A few swaddles, a neutral blanket, and a safe surface are enough. Personal items like heirloom quilts can add meaning.
Can we include older siblings or pets?
Yes—plan early. Photograph sibling images first and reward cooperation with a short break. Keep pets controlled and safe around the babies.
Is natural light enough in winter?
Often yes, if you shoot during the brightest window and use reflectors. A small bounced LED can help if needed.
What if one twin is much sleepier than the other?
Start with the sleepier twin’s details and keep easy side-by-side setups ready. Switch to parent cuddles if timing drifts.
Bringing it all together
With the right preparation, safety mindset, and a simple plan for light, posing, and timing, photographing twins at home in the Greater Toronto Area becomes a warm, memorable experience. Your condo or family home holds the stories and textures that make your images uniquely yours. Whether you follow this guide for a DIY session or invite a professional to lead the way, you’ll create a gallery that honors each twin’s individuality and their incredible bond.
Ready to create calm, beautiful twin portraits in 2026? Contact Merry Pix at https://www.merrypix.ca/contact/ to plan your at-home session anywhere in the GTA.